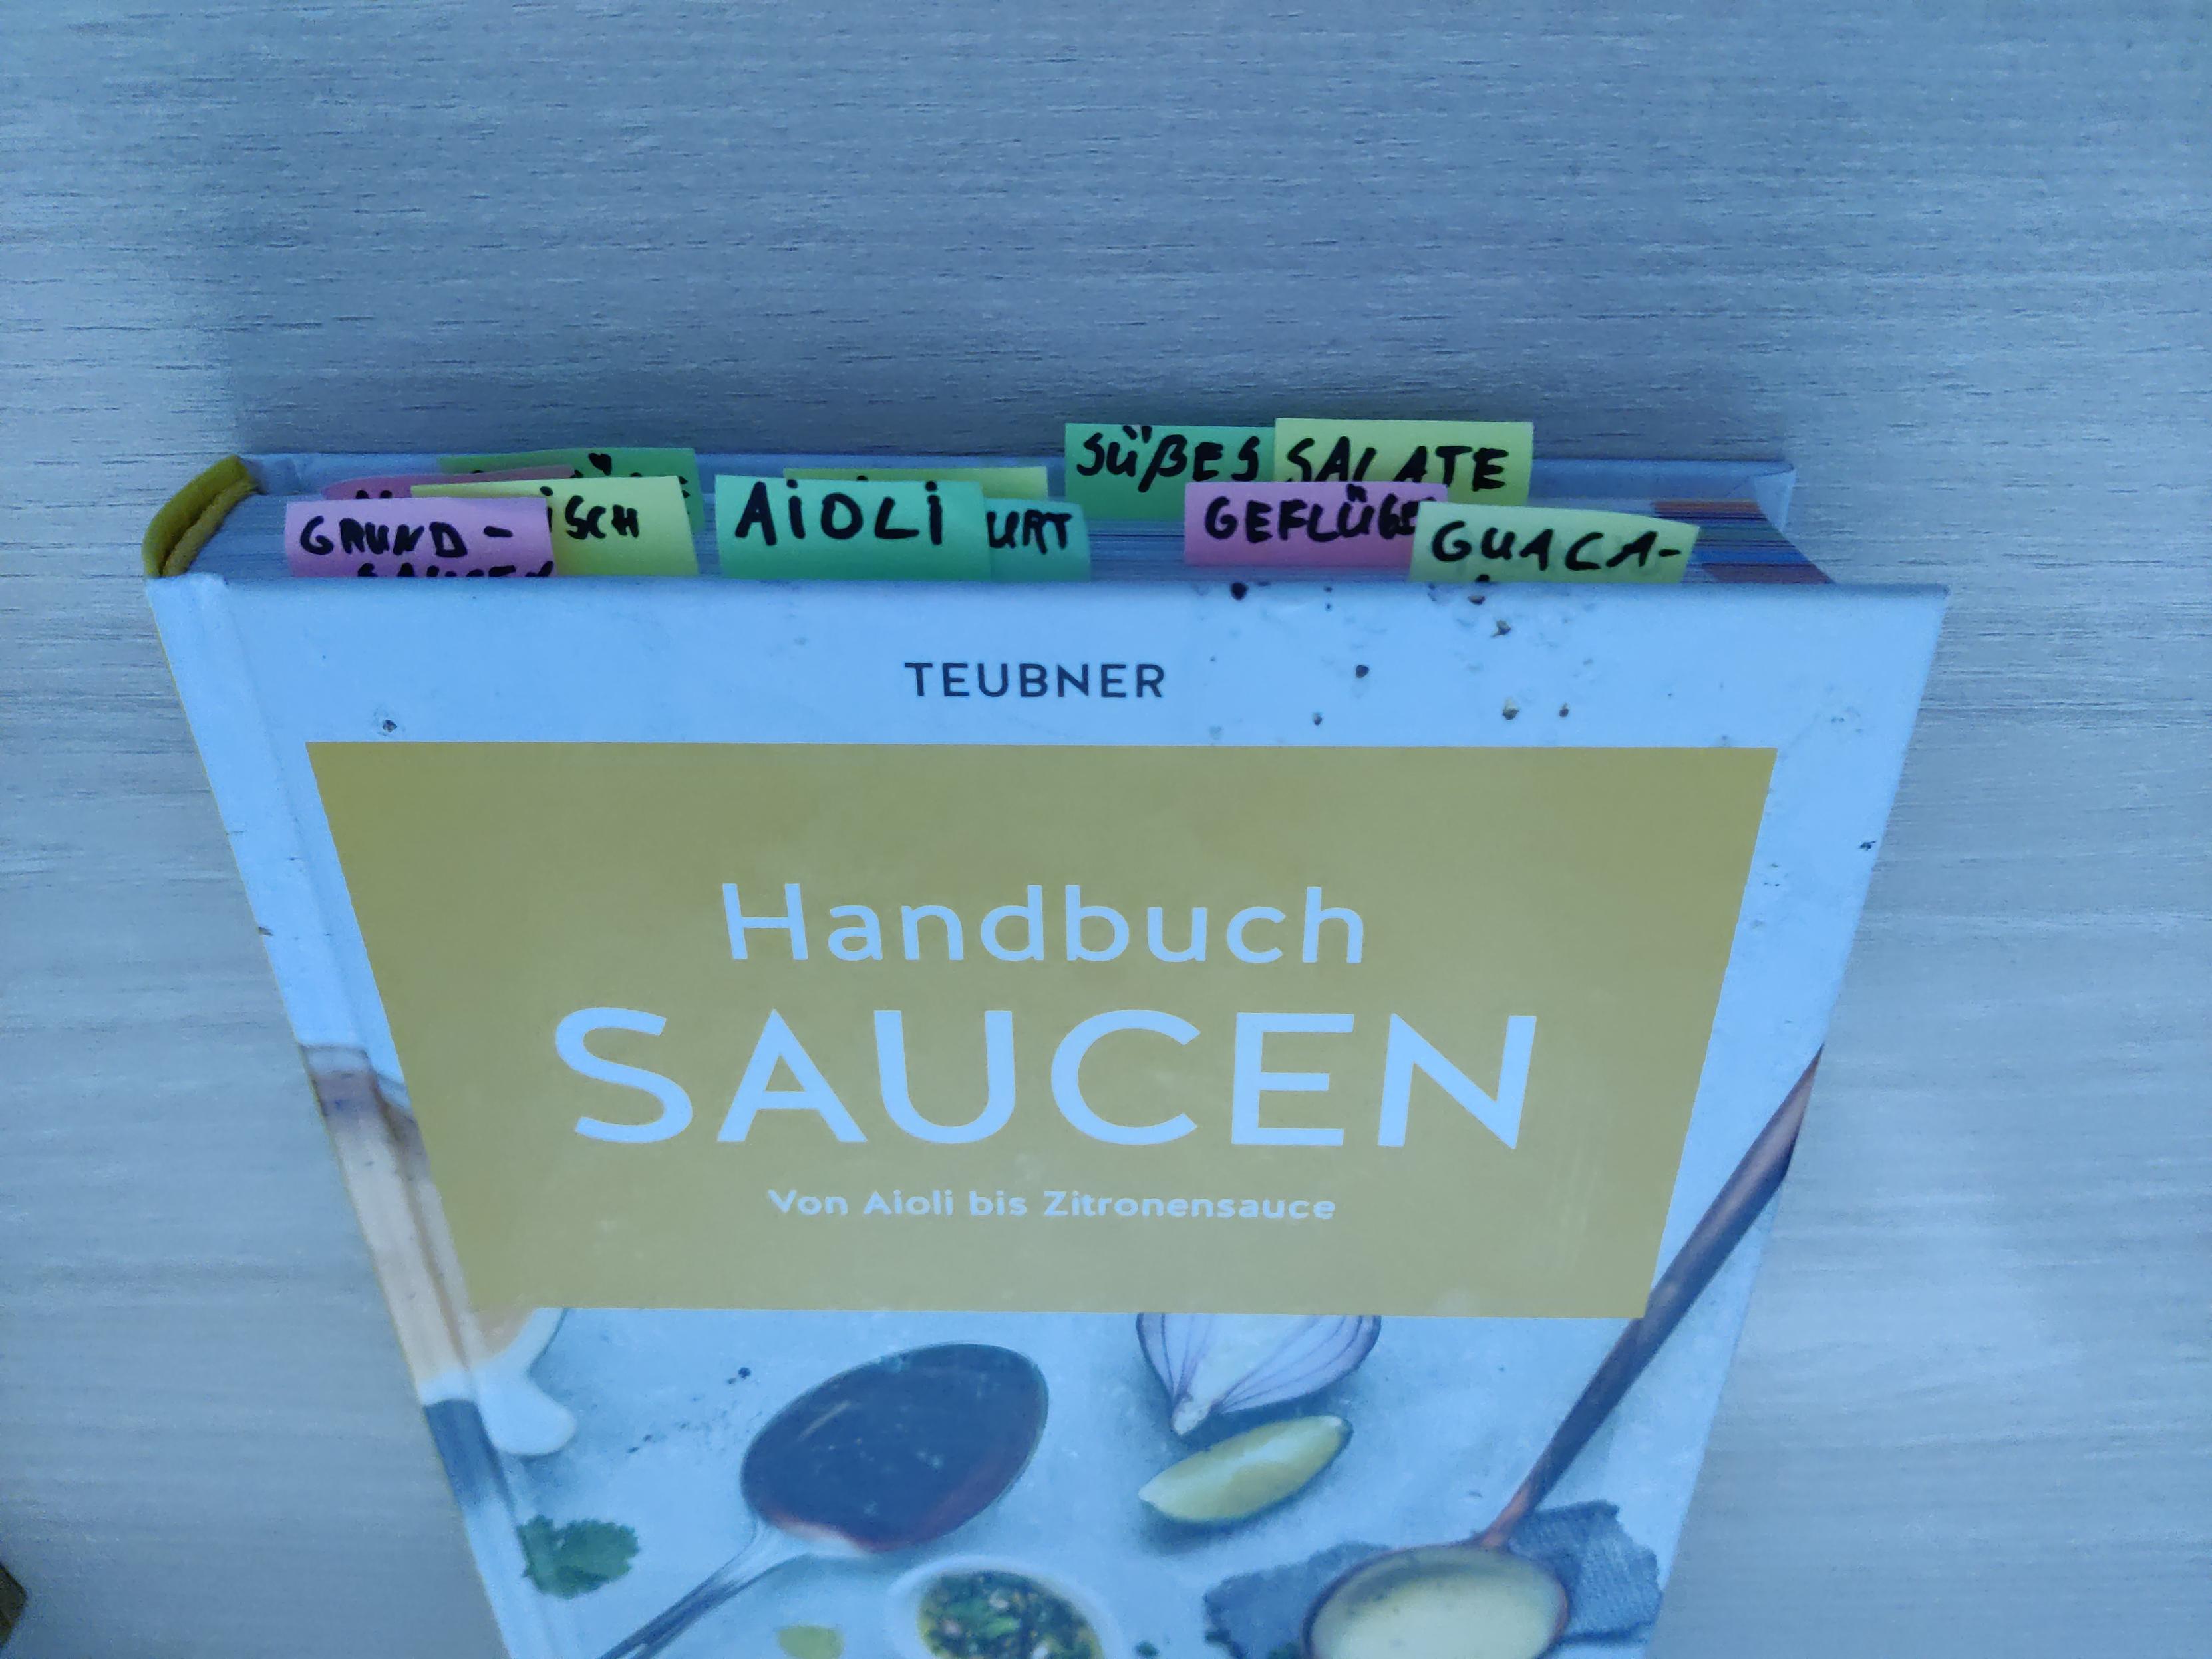
Feuerfest

Just the private blog of a Linux sysadmin

How to monitor your APT-repositories with Icinga

Photo by Pixabay: https://www.pexels.com/photo/software-engineers-working-on-computers-256219/

During my series about unattended-upgrades (Part 1, Part 2) I noticed that a Debian Mirror I use was unresponsive for 22 days but I had nothing to notify me of this. As this also meant that unattended-upgrades didn't apply any patches I wanted a check for this which in turn will trigger unattended-upgrades when there are outstanding updates.

The problem

The monitoring-plugins provide the check_apt plugin. This is normally used to check for available packages. However, in the default configuration it doesn't execute an apt-get update as this requires root privileges. Personally I think the risk is worth the gain. As adding the -u parameter will execute an apt-get update and therefore check_apt will notify you when apt-get update finishes with a non-zero exit-code.

Take the following problem:

root@host:~# apt-get update
Hit:1 http://security.debian.org/debian-security bookworm-security InRelease
Hit:2 http://debian.tu-bs.de/debian bookworm InRelease
Get:3 http://debian.tu-bs.de/debian bookworm-updates InRelease [55.4 kB]
Reading package lists... Done
E: Release file for http://debian.tu-bs.de/debian/dists/bookworm-updates/InRelease is expired (invalid since 16d 0h 59min 33s). Updates for this repository will not be applied.

A mere check_apt wont notify you of any problems:

root@host:~# /usr/lib/nagios/plugins/check_apt
APT CRITICAL: 12 packages available for upgrade (12 critical updates). |available_upgrades=12;;;0 critical_updates=12;;;0

Making this go undetected.

Executed with the -u parameter however, we are notified of the problem:

root@host:~# /usr/lib/nagios/plugins/check_apt -u
'/usr/bin/apt-get -q update' exited with non-zero status.
APT CRITICAL: 12 packages available for upgrade (12 critical updates).  warnings detected, errors detected.|available_upgrades=12;;;0 critical_updates=12;;;0

The solution

Fixing this via Icinga is however a bit more complicated, as the standard apt CheckCommand from the Icinga Template Library (ITL) doesn't include the -u option and isn't prefixed to use sudo despite root privileges being needed. This can be checked here: https://github.com/Icinga/icinga2/blob/master/itl/command-plugins.conf#L2155 or in your local /usr/share/icinga2/include/command-icinga.conf if you happen to use Icinga.

The root cause is also the number one main problem I have with the check_apt CheckPlugin. check_apt is designed to actually install package updates when check_apt reports outstanding available updates. This however breaks the number one paradigm I have regarding monitoring systems: They should not modify the system on their own. And when they do, they should do it in the same way as it is normally done. check_apt breaks this.

Maybe that person should have read a blog article about unattended-upgrades prior to writting that plugin? 😜

Normally you utilize Event Commands for that type of scenario: "If service X is in state Y execute event command Z."

The CheckCommand check_apt_update

Therefore I recommend creating your own apt_update CheckCommand and using that.

object CheckCommand "check_apt_update" {
        command = [ "/usr/bin/sudo", + PluginDir + "/check_apt" ]

        arguments = {
                "-u" = {
                        description = "Perform an apt-get update"
                }
        }
}

Defining the service and configuring the EventCommand

Then in your service definition add a suitable event_command:

apply Service "apt repositories" to Host {
  import "hourly-service"

  check_command = "check_apt_update"

  enable_event_handler = true
  // Execute unattended-upgrades automatically if service goes critical
  event_command = "execute_unattended_upgrades"
  // For services which should be executed ON the host itself
  command_endpoint = host.vars.agent_endpoint

  assign where host.vars.distribution == "Debian"

}

Creating the EventCommand

And create the EventCommand like this:

object EventCommand "execute_unattended_upgrades" {
  command = "sudo /usr/bin/unattended-upgrades"
}

Necessary sudo rights

This requires a sudo config file for the icinga user executing that command. And the commands must be executable without the need for a TTY, hence we end up with the following:

root@host:~# cat /etc/sudoers.d/icinga2
# This line disables the need for a tty for sudo
#  else we will get all kind of "sudo: a password is required" errors
Defaults:icinga2 !requiretty

# sudo rights for Icinga2
icinga2  ALL=(ALL) NOPASSWD: /usr/bin/unattended-upgrades
icinga2  ALL=(ALL) NOPASSWD: /usr/bin/unattended-upgrade
icinga2  ALL=(ALL) NOPASSWD: /usr/bin/apt-get
icinga2  ALL=(ALL) NOPASSWD: /usr/lib/nagios/plugins/check_apt

Conclusion

This is now sufficient as I'm notified when something prevents APT from properly updating the package lists. APT itself takes care to validate the various entries inside the Release file and exits with a non-zero exit-code, so there is no need to put that logic inside of check_apt.

Setting up similar checks for other monitoring systems is of course also possible. In general raising an alarm when apt-get update throws an non-zero exit-code is a somewhat foolproof method.

Comments

Using and configuring unattended-upgrades under Debian Bookworm - Part 2: Practise

Photo by Markus Winkler: https://www.pexels.com/photo/the-word-update-is-spelled-out-in-scrabble-tiles-18524143/

Preface

At the time of this writing Debian Bookworm is the stable release of Debian. It utilizes Systemd timers for all automation tasks such as the updating of the package lists and execution of the actual apt-get upgrade. Therefore we won't need to configure APT-Parameters in files like /etc/apt/apt.conf.d/02periodic. In fact some of these files don't even exist on my systems. Keep that in mind if you read this article along with others, who might do things differently - or for older/newer releases of Debian.

Part 1 where I talk about the basics and prerequisites of unattended-upgrades along with many questions you should have answered prior using it is here: Using and configuring unattended-upgrades under Debian Bookworm - Part 1: Preparations

Note: As it took me considerably longer than expected to write this post please ignore discrepances in timestamps and versions.

Installing unattended-upgrades - however it's (most likely) not active yet

Enough with theory, let's switch to the shell. The installation is rather easy, a simple apt-get install unattended-upgrades is enough. However if you run the installation in an interactive way like this unattended-upgrades isn't configured to run automatically. The file /etc/apt/apt.conf.d/20auto-upgrades is missing. So check if it is present!

Note: That's one reason why you want to set the environment variable export DEBIAN_FRONTEND=noninteractive prior to the installation in your Ansible Playbooks/Puppet Manifest/Runbooks/Scripts, etc. or execute an dpkg-reconfigure -f noninteractive unattended-upgrades after the installation. Of course placing the file also solves the problem.😉

If you want to re-configure unattended-upgrades manually execute: dpkg-reconfigure unattended-upgrades and select yes at the prompt. But I advise you not just do it right yet.

root@host:~# apt-get install unattended-upgrades
Reading package lists... Done
Building dependency tree... Done
Reading state information... Done
The following additional packages will be installed:
  gir1.2-glib-2.0 libgirepository-1.0-1 python3-dbus python3-distro-info python3-gi
Suggested packages:
  python-dbus-doc bsd-mailx default-mta | mail-transport-agent needrestart powermgmt-base
The following NEW packages will be installed:
  gir1.2-glib-2.0 libgirepository-1.0-1 python3-dbus python3-distro-info python3-gi unattended-upgrades
0 upgraded, 6 newly installed, 0 to remove and 50 not upgraded.
Need to get 645 kB of archives.
After this operation, 2,544 kB of additional disk space will be used.
Do you want to continue? [Y/n]
Get:1 http://debian.tu-bs.de/debian bookworm/main amd64 libgirepository-1.0-1 amd64 1.74.0-3 [101 kB]
Get:2 http://debian.tu-bs.de/debian bookworm/main amd64 gir1.2-glib-2.0 amd64 1.74.0-3 [159 kB]
Get:3 http://debian.tu-bs.de/debian bookworm/main amd64 python3-dbus amd64 1.3.2-4+b1 [95.1 kB]
Get:4 http://debian.tu-bs.de/debian bookworm/main amd64 python3-distro-info all 1.5+deb12u1 [6,772 B]
Get:5 http://debian.tu-bs.de/debian bookworm/main amd64 python3-gi amd64 3.42.2-3+b1 [219 kB]
Get:6 http://debian.tu-bs.de/debian bookworm/main amd64 unattended-upgrades all 2.9.1+nmu3 [63.3 kB]
Fetched 645 kB in 0s (1,618 kB/s)
Preconfiguring packages ...
Selecting previously unselected package libgirepository-1.0-1:amd64.
(Reading database ... 33397 files and directories currently installed.)
Preparing to unpack .../0-libgirepository-1.0-1_1.74.0-3_amd64.deb ...
Unpacking libgirepository-1.0-1:amd64 (1.74.0-3) ...
Selecting previously unselected package gir1.2-glib-2.0:amd64.
Preparing to unpack .../1-gir1.2-glib-2.0_1.74.0-3_amd64.deb ...
Unpacking gir1.2-glib-2.0:amd64 (1.74.0-3) ...
Selecting previously unselected package python3-dbus.
Preparing to unpack .../2-python3-dbus_1.3.2-4+b1_amd64.deb ...
Unpacking python3-dbus (1.3.2-4+b1) ...
Selecting previously unselected package python3-distro-info.
Preparing to unpack .../3-python3-distro-info_1.5+deb12u1_all.deb ...
Unpacking python3-distro-info (1.5+deb12u1) ...
Selecting previously unselected package python3-gi.
Preparing to unpack .../4-python3-gi_3.42.2-3+b1_amd64.deb ...
Unpacking python3-gi (3.42.2-3+b1) ...
Selecting previously unselected package unattended-upgrades.
Preparing to unpack .../5-unattended-upgrades_2.9.1+nmu3_all.deb ...
Unpacking unattended-upgrades (2.9.1+nmu3) ...
Setting up python3-dbus (1.3.2-4+b1) ...
Setting up libgirepository-1.0-1:amd64 (1.74.0-3) ...
Setting up python3-distro-info (1.5+deb12u1) ...
Setting up unattended-upgrades (2.9.1+nmu3) ...

Creating config file /etc/apt/apt.conf.d/50unattended-upgrades with new version
Created symlink /etc/systemd/system/multi-user.target.wants/unattended-upgrades.service → /lib/systemd/system/unattended-upgrades.service.
Synchronizing state of unattended-upgrades.service with SysV service script with /lib/systemd/systemd-sysv-install.
Executing: /lib/systemd/systemd-sysv-install enable unattended-upgrades
Setting up gir1.2-glib-2.0:amd64 (1.74.0-3) ...
Setting up python3-gi (3.42.2-3+b1) ...
Processing triggers for man-db (2.11.2-2) ...
Processing triggers for libc-bin (2.36-9+deb12u3) ...
root@host:~# 

After the installation we have a new Systemd service called unattended-upgrades.service however, if you think that stopping this service will disable unattended-upgrades you are mistaken. This unit-file solely exists to check if an unattended-upgrades run is in progress and ensure it isn't killed mid-process, for example, during a shutdown.

To disable unattended-upgrades we need to change the values in /etc/apt/apt.conf.d/20auto-upgrades to zero. But as written above: This file currently isn't present in our system yet.

root@host:~# ls -lach /etc/apt/apt.conf.d/20auto-upgrades
ls: cannot access '/etc/apt/apt.conf.d/20auto-upgrades': No such file or directory

However, as we want to have a look at the internals first, we do not fix this yet. Instead, let us have a look at the relevant Systemd unit and timer-files.

The Systemd unit and timer files unattended-upgrades relies upon

An systemctl list-timers --all will show you all in-/active timer files on our system along with the unit-file which is triggered by the timer. On every Debian system utilizing Systemd you will most likely have the following unit and timers files per-default. Even when unattended-upgrades is not installed.

root@host:~# systemctl list-timers --all
NEXT                         LEFT          LAST                         PASSED       UNIT                         ACTIVATES
Sat 2024-10-26 00:00:00 CEST 15min left    Fri 2024-10-25 00:00:00 CEST 23h ago      dpkg-db-backup.timer         dpkg-db-backup.service
Sat 2024-10-26 00:00:00 CEST 15min left    Fri 2024-10-25 00:00:00 CEST 23h ago      logrotate.timer              logrotate.service
Sat 2024-10-26 06:39:59 CEST 6h left       Fri 2024-10-25 06:56:26 CEST 16h ago      apt-daily-upgrade.timer      apt-daily-upgrade.service
Sat 2024-10-26 10:27:42 CEST 10h left      Fri 2024-10-25 08:18:00 CEST 15h ago      man-db.timer                 man-db.service
Sat 2024-10-26 11:13:30 CEST 11h left      Fri 2024-10-25 21:06:00 CEST 2h 38min ago apt-daily.timer              apt-daily.service
Sat 2024-10-26 22:43:26 CEST 22h left      Fri 2024-10-25 22:43:26 CEST 1h 0min ago  systemd-tmpfiles-clean.timer systemd-tmpfiles-clean.service
Sun 2024-10-27 03:10:37 CET  1 day 4h left Sun 2024-10-20 03:11:00 CEST 5 days ago   e2scrub_all.timer            e2scrub_all.service
Mon 2024-10-28 01:12:51 CET  2 days left   Mon 2024-10-21 01:40:06 CEST 4 days ago   fstrim.timer                 fstrim.service

9 timers listed.

Relevant are apt-daily.timer which activates apt-daily.service. This unit-file will execute /usr/lib/apt/apt.systemd.daily update. The script takes care of reading the necessary APT parameters and performing an apt-get update to update the package lists.

The timer apt-daily-upgrade.timer triggers the service apt-daily-upgrade.service. The unit-file will perform an /usr/lib/apt/apt.systemd.daily install and this is where the actual "apt-get upgrade-magic" happens. If the appropriate APT-values are set outstanding updates will be downloaded and installed.

Notice the absence of a specific unattended-upgrades unit-file or timer as unattended-upgrades is really just a script to automate the APT package system.

This effectively means: You are able to configure when package-list updates will be done and updates are installed by modifying the OnCalendar= parameter via drop-in files for the apt-daily(-upgrade).timer files.
The Systemd.timer documentation and man 7 systemd.time (systemd.time documentation) have all the glorious details.

I wont go into further detail regarding the /usr/lib/apt/apt.systemd.daily script. If you want to know more I recommend executing the script with bash's -x parameter (also called debug mode). This way commands and values are printed out as the script is run.

root@host:~# bash -x /usr/lib/apt/apt.systemd.daily update
# Read the output, view the script, trace the parameters and then execute:
root@host:~# bash -x /usr/lib/apt/apt.systemd.daily lock_is_held update

Or if you are more interested in the actual "How are the updates installed?"-part, perform the following:

root@host:~# bash -x /usr/lib/apt/apt.systemd.daily install
# Read the output, view the script, trace the parameters and then execute:
root@host:~# bash -x /usr/lib/apt/apt.systemd.daily lock_is_held install

It's a good lesson in understanding APT-internals/what Debian is running "under the hood".

But again: I advise you to make sure that no actual updates are installed when you do so. In order to learn how to make sure read along. 😇

How does everything work together? What makes unattended-upgrades being unattended?

Let us recapitulate. We installed the unattended-upgrades package, checked the relevant Systemd unit & timer files and had a brief look at the /usr/lib/apt/apt.systemd.daily script which is responsible for triggering the appropriate APT and unattended-upgrades commands.

APT itself is configured via the file in /etc/apt/apt.conf.d/. How can APT (or any human) know the setting of a specific parameter? Sure, you can grep through all the files - but that would also most likely include files with syntax errors etc.

Luckily there is apt-config this allows us to query APT and read specific values. This also makes sure of validating everything. If you've configured an APT-parameter in a file but apt-config doesn't reflect this - it's simply not applied and you must start to search where the error is.

Armed with this knowledge we can execute the following two commands to check if our package-lists will be updated automatically via the apt-daily.service and if unattended-upgrades will install packages. If there is no associated value, apt-config won't print out anything.

The two settings which are set inside /etc/apt/apt.conf.d/20auto-upgrades are APT::Periodic::Update-Package-Lists and APT::Periodic::Unattended-Upgrade. The first activates the automatic package-list updates while the later enables the automatic installation of updates. If we check them on our system with the manually installed unattended-upgrades package we will get the following:

root@host:~# apt-config dump APT::Periodic::Update-Package-Lists
root@host:~# apt-config dump APT::Periodic::Unattended-Upgrade

This means no package-list updates, no installation of updates. And currently this is what we want to keep experimenting a little bit before we are ready to hit production.

A working unattended-upgrades will give the following values:

root@host:~# apt-config dump APT::Periodic::Update-Package-Lists
APT::Periodic::Update-Package-Lists "1";
root@host:~# apt-config dump APT::Periodic::Unattended-Upgrade
APT::Periodic::Unattended-Upgrade "1";

First dry-run

Time to start our first unattended-upgrades dry-run. This way we can watch what would be done without actually modifying anything. I recommend utilizing the -v parameter in addition to --dry-run as else the following first 8 lines from the unattended-upgrades output itself will be omitted. Despite them being the most valuable ones for most novice users.

root@host:~# unattended-upgrades --dry-run -v
Checking if system is running on battery is skipped. Please install powermgmt-base package to check power status and skip installing updates when the system is running on battery.
Starting unattended upgrades script
Allowed origins are: origin=Debian,codename=bookworm,label=Debian, origin=Debian,codename=bookworm,label=Debian-Security, origin=Debian,codename=bookworm-security,label=Debian-Security
Initial blacklist:
Initial whitelist (not strict):
Option --dry-run given, *not* performing real actions
Packages that will be upgraded: base-files bind9-dnsutils bind9-host bind9-libs dnsutils git git-man initramfs-tools initramfs-tools-core intel-microcode libc-bin libc-l10n libc6 libc6-i386 libcurl3-gnutls libexpat1 libnss-systemd libpam-systemd libpython3.11-minimal libpython3.11-stdlib libssl3 libsystemd-shared libsystemd0 libudev1 linux-image-amd64 locales openssl python3.11 python3.11-minimal qemu-guest-agent systemd systemd-sysv systemd-timesyncd udev
Writing dpkg log to /var/log/unattended-upgrades/unattended-upgrades-dpkg.log
/usr/bin/dpkg --status-fd 10 --no-triggers --unpack --auto-deconfigure --recursive /tmp/apt-dpkg-install-o5g9u2
/usr/bin/dpkg --status-fd 10 --no-triggers --configure libsystemd0:amd64 libsystemd-shared:amd64 systemd:amd64
/usr/bin/dpkg --status-fd 10 --no-triggers --unpack --auto-deconfigure /var/cache/apt/archives/systemd-sysv_252.30-1~deb12u2_amd64.deb /var/cache/apt/archives/udev_252.30-1~deb12u2_amd64.deb /var/cache/apt/archives/libudev1_252.30-1~deb12u2_amd64.deb
/usr/bin/dpkg --status-fd 10 --no-triggers --configure libudev1:amd64
/usr/bin/dpkg --status-fd 10 --configure --pending
Preconfiguring packages ...
/usr/bin/dpkg --status-fd 10 --no-triggers --unpack --auto-deconfigure /var/cache/apt/archives/libc6-i386_2.36-9+deb12u8_amd64.deb /var/cache/apt/archives/libc6_2.36-9+deb12u8_amd64.deb
/usr/bin/dpkg --status-fd 10 --no-triggers --configure libc6:amd64
/usr/bin/dpkg --status-fd 10 --no-triggers --unpack --auto-deconfigure /var/cache/apt/archives/libc-bin_2.36-9+deb12u8_amd64.deb
/usr/bin/dpkg --status-fd 10 --no-triggers --configure libc-bin:amd64
/usr/bin/dpkg --status-fd 10 --no-triggers --unpack --auto-deconfigure /var/cache/apt/archives/libc-l10n_2.36-9+deb12u8_all.deb /var/cache/apt/archives/locales_2.36-9+deb12u8_all.deb
/usr/bin/dpkg --status-fd 10 --configure --pending
/usr/bin/dpkg --status-fd 10 --no-triggers --unpack --auto-deconfigure /var/cache/apt/archives/intel-microcode_3.20240813.1~deb12u1_amd64.deb
/usr/bin/dpkg --status-fd 10 --configure --pending
/usr/bin/dpkg --status-fd 10 --no-triggers --unpack --auto-deconfigure /var/cache/apt/archives/python3.11_3.11.2-6+deb12u3_amd64.deb /var/cache/apt/archives/libpython3.11-stdlib_3.11.2-6+deb12u3_amd64.deb /var/cache/apt/archives/python3.11-minimal_3.11.2-6+deb12u3_amd64.deb /var/cache/apt/archives/libpython3.11-minimal_3.11.2-6+deb12u3_amd64.deb
/usr/bin/dpkg --status-fd 10 --configure --pending
/usr/bin/dpkg --status-fd 10 --no-triggers --unpack --auto-deconfigure /var/cache/apt/archives/git_1%3a2.39.5-0+deb12u1_amd64.deb /var/cache/apt/archives/git-man_1%3a2.39.5-0+deb12u1_all.deb
/usr/bin/dpkg --status-fd 10 --configure --pending
/usr/bin/dpkg --status-fd 10 --no-triggers --unpack --auto-deconfigure /var/cache/apt/archives/base-files_12.4+deb12u7_amd64.deb
/usr/bin/dpkg --status-fd 10 --no-triggers --configure base-files:amd64
/usr/bin/dpkg --status-fd 10 --configure --pending
/usr/bin/dpkg --status-fd 10 --no-triggers --unpack --auto-deconfigure /var/cache/apt/archives/initramfs-tools_0.142+deb12u1_all.deb /var/cache/apt/archives/initramfs-tools-core_0.142+deb12u1_all.deb
/usr/bin/dpkg --status-fd 10 --configure --pending
/usr/bin/dpkg --status-fd 10 --no-triggers --unpack --auto-deconfigure /var/cache/apt/archives/bind9-dnsutils_1%3a9.18.28-1~deb12u2_amd64.deb /var/cache/apt/archives/bind9-host_1%3a9.18.28-1~deb12u2_amd64.deb /var/cache/apt/archives/bind9-libs_1%3a9.18.28-1~deb12u2_amd64.deb /var/cache/apt/archives/dnsutils_1%3a9.18.28-1~deb12u2_all.deb
/usr/bin/dpkg --status-fd 10 --configure --pending
/usr/bin/dpkg --status-fd 10 --no-triggers --unpack --auto-deconfigure /var/cache/apt/archives/libexpat1_2.5.0-1+deb12u1_amd64.deb
/usr/bin/dpkg --status-fd 10 --configure --pending
/usr/bin/dpkg --status-fd 10 --no-triggers --unpack --auto-deconfigure /var/cache/apt/archives/qemu-guest-agent_1%3a7.2+dfsg-7+deb12u7_amd64.deb
/usr/bin/dpkg --status-fd 10 --configure --pending
/usr/bin/dpkg --status-fd 10 --no-triggers --unpack --auto-deconfigure /var/cache/apt/archives/libssl3_3.0.14-1~deb12u2_amd64.deb /var/cache/apt/archives/openssl_3.0.14-1~deb12u2_amd64.deb
/usr/bin/dpkg --status-fd 10 --configure --pending
/usr/bin/dpkg --status-fd 10 --no-triggers --unpack --auto-deconfigure /var/cache/apt/archives/libcurl3-gnutls_7.88.1-10+deb12u7_amd64.deb
/usr/bin/dpkg --status-fd 10 --configure --pending
/usr/bin/dpkg --status-fd 10 --no-triggers --unpack --auto-deconfigure /var/cache/apt/archives/linux-image-6.1.0-26-amd64_6.1.112-1_amd64.deb /var/cache/apt/archives/linux-image-amd64_6.1.112-1_amd64.deb
/usr/bin/dpkg --status-fd 10 --configure --pending
All upgrades installed
The list of kept packages can't be calculated in dry-run mode.
root@host:~#

We get told which configured origins will be used (see part 1), all packages on the black- and whitelist and which actual packages will be upgraded. Just like if you are executing apt-get upgrade manually.

Also there is the neat line Writing dpkg log to /var/log/unattended-upgrades/unattended-upgrades-dpkg.log informing us of a logfile being written. How nice!

The dpkg-commands are what normally happens in the background to install and configure the packages. In 99% of all cases this is irrelevant. Nevertheless they become invaluable when an update goes sideways or dpkg/apt can't properly configure a package.

Where do we find this information afterwards?

Logfiles

There are two logfiles being written:

  1. /var/log/unattended-upgrades/unattended-upgrades-dpkg.log
  2. /var/log/unattended-upgrades/unattended-upgrades.log

And how do they differ?

/var/log/unattended-upgrades/unattended-upgrades-dpkg.log has all output from dpkg/apt itself. You remember all these Preparing to unpack... packagename, Unpacking packagename, Setting up packagename lines? The lines you encounter when you execute apt-get manually? Who weren't present in the output from our dry-run? This gets logged into that file. So if you are wondering when a certain packages was installed or what went wrong, this is the logfile to look into.

/var/log/unattended-upgrades/unattended-upgrades.log contains the output from unattended-upgrades itself. This makes it possible to check what allowed origins/blacklists/whitelists, etc. were used in a run. Conveniently the output also includes the packages which are suitable for upgrading.

Options! Give me options!

Now that we know how we can execute a dry-run and retrace what happened it's time to have a look at the various options unattended-upgrades offers.

I recommend reading the config file /etc/apt/apt.conf.d/50unattended-upgrades once completely as the various options to fine-tune the behaviour are listed at the end. If you want unattended-upgrades to send mails, or only install updates on shutdown/reboot this is your way to go.

Or do you want an automatic reboot after unattended-upgrades has done its job (see: Unattended-Upgrade::Automatic-Reboot)? Ensuring the new kernel and system libraries are instantly used? This is your way to go.

Adding the Proxmox Repository to unattended-upgrades

Enabling updates for packages in different repositories means we have to add a new Repository to unattended-upgrades first. Using our knowledge from Part 1 and looking at the Release file for the Proxmox pve-no-subscription Debian Bookworm repository we can build the following origins-pattern:

"origin=Proxmox,codename=${distro_codename},label=Proxmox Debian Repository,a=stable";

A new dry-run will show us that the packages proxmox-default-kernel and proxmox-kernel-6.5 will be upgraded.

root@host:~# unattended-upgrades -v --dry-run
Checking if system is running on battery is skipped. Please install powermgmt-base package to check power status and skip installing updates when the system is runnin on battery.
Checking if connection is metered is skipped. Please install python3-gi package to detect metered connections and skip downloading updates.
Starting unattended upgrades script
Allowed origins are: origin=Debian,codename=bookworm,label=Debian, origin=Debian,codename=bookworm,label=Debian-Security, origin=Debian,codename=bookworm-security,labl=Debian-Security, origin=Proxmox,codename=bookworm,label=Proxmox Debian Repository,a=stable
Initial blacklist:
Initial whitelist (not strict):
Option --dry-run given, *not* performing real actions
Packages that will be upgraded: proxmox-default-kernel proxmox-kernel-6.5
Writing dpkg log to /var/log/unattended-upgrades/unattended-upgrades-dpkg.log
/usr/bin/dpkg --status-fd 10 --no-triggers --unpack --auto-deconfigure /var/cache/apt/archives/proxmox-kernel-6.8.8-2-pve-signed_6.8.8-2_amd64.deb /var/cache/apt/archves/proxmox-kernel-6.8_6.8.8-2_all.deb /var/cache/apt/archives/proxmox-default-kernel_1.1.0_all.deb
/usr/bin/dpkg --status-fd 10 --configure --pending
/usr/bin/dpkg --status-fd 10 --no-triggers --unpack --auto-deconfigure /var/cache/apt/archives/proxmox-kernel-6.5.13-5-pve-signed_6.5.13-5_amd64.deb /var/cache/apt/arhives/proxmox-kernel-6.5_6.5.13-5_all.deb
/usr/bin/dpkg --status-fd 10 --configure --pending
All upgrades installed
The list of kept packages can't be calculated in dry-run mode.

In the next step we will use this to see how blacklisting works.

Note: Enabling unattended-upgrades for the Proxmox packages on the Proxmox host itself is a controversial topic. In clustered & productive setups I wouldn't recommend it too. But given this is my single-node, homelab Proxmox I have no problem with it.

However I have no problem with enabling OS updates as this is no difference from what Proxmox themselves does/recommends: https://pve.proxmox.com/pve-docs/pve-admin-guide.html#system_software_updates

Blacklisting packages

Excluding a certain package from the automatic updates can be done in two different ways. Either you don't include the repository into the Unattended-Upgrade::Origins-Pattern block - effectively excluding all packages in the repository. Or you exclude only single packages by listing them inside the Unattended-Upgrade::Package-Blacklist block. The configuration file has examples for the various patterns needed (exact match, name beginning with a certain string, escaping, etc.)

The following line will blacklist all packages starting with proxmox- in their name.

Unattended-Upgrade::Package-Blacklist {
    // The following matches all packages starting with linux-
    //  "linux-";

    // Blacklist all proxmox- packages
    "proxmox-";

    [...]
};

Executing a dry-run again will give the following result:

root@host:~# unattended-upgrades -v --dry-run
Checking if system is running on battery is skipped. Please install powermgmt-base package to check power status and skip installing updates when the system is running on battery.
Checking if connection is metered is skipped. Please install python3-gi package to detect metered connections and skip downloading updates.
Starting unattended upgrades script
Allowed origins are: origin=Debian,codename=bookworm,label=Debian, origin=Debian,codename=bookworm,label=Debian-Security, origin=Debian,codename=bookworm-security,label=Debian-Security, origin=Proxmox,codename=bookworm,label=Proxmox Debian Repository,a=stable
Initial blacklist: proxmox-
Initial whitelist (not strict):
No packages found that can be upgraded unattended and no pending auto-removals
The list of kept packages can't be calculated in dry-run mode.

"The following packages have been kept back" - What does this mean? Will unattended-upgrades help me?

Given is the following output from a manual apt-get upgrade run.

root@host:~# apt-get upgrade
Reading package lists... Done
Building dependency tree... Done
Reading state information... Done
Calculating upgrade... Done
The following packages have been kept back:
  proxmox-default-kernel proxmox-kernel-6.5
0 upgraded, 0 newly installed, 0 to remove and 2 not upgraded.

The message means that the packages are part of so-called PhasedUpdates. Sadly documentation regarding this in Debian is a bit sparse. The manpage for apt_preference(5) has a paragraph about it but that's pretty much it.

Ubuntu has a separate Wiki article about it, as their update manager honors the setting: https://wiki.ubuntu.com/PhasedUpdates

What it means is that some updates won't be rolled out to all servers immediately. Instead a random number is generated which determines if the update is applied or not.

Quote from apt_preferences(5):
"A system's eligibility to a phased update is determined by seeding random number generator with the package source name, the version number, and /etc/machine-id, and then calculating an integer in the range [0, 100]. If this integer is larger than the Phased-Update-Percentage, the version is pinned to 1, and thus held back. Otherwise, normal policy rules apply."

Unattended-upgrades however will ignore this and install the updates. If that is good or bad depends on your situation. Luckily there was some recent activity in the GitHub Issue regarding this topic, so it may be resolved soon-ish: unattended-upgrades on GitHub, issue 259: Please honor Phased-Update-Percentage for package versions

Enabling unattended-upgrades

Now it's finally time to enable unattended-upgrades for our system. Execute dpkg-reconfigure -f noninteractive unattended-upgrades and check that the /etc/apt/apt.conf.d/20auto-upgrades file is present with the following content:

root@host:~# cat /etc/apt/apt.conf.d/20auto-upgrades
APT::Periodic::Update-Package-Lists "1";
APT::Periodic::Unattended-Upgrade "1";

After that verify that APT has indeed the correct values for those parameters:

root@host:~# apt-config dump APT::Periodic::Update-Package-Lists
APT::Periodic::Update-Package-Lists "1";
root@host:~# apt-config dump APT::Periodic::Unattended-Upgrade
APT::Periodic::Unattended-Upgrade "1";

You are then able to determine when the first run will happen by checking via systemctl list-timers apt-daily.timer apt-daily-upgrade.timer.

root@host:~# systemctl list-timers apt-daily.timer apt-daily-upgrade.timer
NEXT                        LEFT          LAST                        PASSED  UNIT                    ACTIVATES
Sat 2024-10-26 03:39:58 UTC 16min left    Fri 2024-10-25 09:12:58 UTC 18h ago apt-daily.timer         apt-daily.service
Sat 2024-10-26 06:21:30 UTC 2h 58min left Fri 2024-10-25 06:24:40 UTC 20h ago apt-daily-upgrade.timer apt-daily-upgrade.service

Set yourself a reminder in your calendar to check the logfiles and enjoy your automatic updates!

How to check the health of a Debian mirror

Remember how I, in part 1 of this series, mentioned that Debian mirrors are rarely out-of-sync, etc.? Yep, and now it happened while I was typing this post. The perfect opportunity to show you how to check your Debian mirror.

The error I got was the following:

root@host:~# apt-get update
Hit:1 http://security.debian.org/debian-security bookworm-security InRelease
Hit:2 http://debian.tu-bs.de/debian bookworm InRelease
Get:3 http://debian.tu-bs.de/debian bookworm-updates InRelease [55.4 kB]
Reading package lists... Done
E: Release file for http://debian.tu-bs.de/debian/dists/bookworm-updates/InRelease is expired (invalid since 16d 0h 59min 33s). Updates for this repository will not be applied.

The reason is that the InRelease file contains a Valid-Until timestamp. And currently it has the following value:
Valid-Until: Sat, 22 Jun 2024 20:12:12 UTC

As this error originates on a remote host there is nothing I can do apart from switching to another Debian repository.

But how can you actually check that? https://mirror-master.debian.org/status/mirror-status.html lists the status of all Debian Mirrors. If we search for debian.tu-bs.de we can see that the mirror indeed has problems and since when the error exists.

Side note: Checking the mirror hierarchy can also be relevant sometimes: https://mirror-master.debian.org/status/mirror-hierarchy.html

Also.. 22 days without noticing that the Debian mirror I use is broken? Yeah.. Let's define a monitoring check for that. Something I didn't do for my setup at home.

As this would make this article unnecessarily larger I made a separate blog post about it. So feel free to read this next: How to monitor your APT-repositories with Icinga

Comments

Switching from Heimdall to homepage for my homelab dashboard and using selfh.st for icons

Screenshot from my old Heimdall dashbaord https://admin.brennt.net/bl-content/uploads/pages/cb8f048b5b607d6bbe95db2008f4ad14/heimdall-dashboard.jpg

When you are in IT chances are high you've got a homelab for your selfhosted applications or just a spare RaspberryPi to try out new software or configurations. After all not having to care about damaging or interrupting anything when trying out new stuff is a relaxing thought.

How do you maintain an overview of your environment? Easy: Just use a dashboard.

There are numerous ones and I'll list a few at the bottom of these article. However the main reason for this blog post is that I recently switched from Heimdall (Website, GitHub) to homepage (Website, GitHub) - Yes, their project name could be better in terms of searchability. Reasons were that Heimdall development simply isn't moving forward and it turned out that the layout options are too limited when the number of services grew.

homepage is just offering more options here.

Screenshots

This was my old Heimdall dashboard:

And here is a screenshot of my new homepage dashboard:

I especially like that homepage supports tabs which then displays different (service-)widgets according to the tabs configuration. This saves so much space.

Icons

When you have a dashboard you want some eye-catchers. Small, easily identifiable logos which support you navigating your dashboard. Now, of course I could go to Google search & download each picture on my own. Alas this is a cumbersome process and there are way better options.

Let me introduce you to: Self-Hosted Dashboard Icons (selfh.st/icons/)

This is a site which gathers all sorts of logos. No matter if they are from vendors, projects, brands or various other logos. Basically it's your one-stop-shop for everything regarding logos. And you even can choose between PNG, SVG and WEBP.

homepage even has means to include the icons right away from their site (read https://gethomepage.dev/configs/services/#icons). Although I still opted to download them via wget into the mounted Docker volume.

Another site is Simple Icons. They offer only minimalized black & white icons. As I wanted some color I didn't use them.

And the third option is Material Design Icons by pictogrammers.com. However they are discontinuing their offering of brand logos. This effectively means that many IT & software related logos will vanish. As they are also just black & white I didn't use them too.

But with these 3 sites you have enough options to choose from!

Other dashboards

In case you don't like Heimdall and homepage I can provide you with a small list of other dashboards you can use. Feel free to add a comment in case I missed one!

Comments

Why is it so cumbersome to order simple replacement parts?

Photo by Dan Cristian Pădureț: https://www.pexels.com/photo/blue-and-yellow-phone-modules-1476321/

What I expect from a manufacturer is that I can order spare parts for a certain period of time. Especially those that need to be replaced after a certain amount of time - think of nose-hair trimmer blades.

Yet I am constantly shocked how bad the situation is.

"Yes, we offer replacement blades. A blade costs 15€". While a completely new trimmer including a blade costs 17€. Not cool. I'm not going to get into the whole electronic waste and price gouging thing. But prices like this, for small parts like this? It smells of both.

Or take my mechanical computer keyboard. I own a "Das Keyboard" Professional S with ISO/DE layout for over 15 years. It works flawlessly. Since I own it, no matter how long I type, my knuckles no longer hurt. Thanks to the Cherry MX Brown switches, there is also no clicking noise when the keys are pressed.

Now after over 15 years of use, the Enter keycap has broken. What do I mean by a keycap? Most mechanical keyboards use some sort of switch - Cherry MX Brown or Cherry MX Blue, for example - that determines how much kinetic force you have to apply to the key before it is recognised as being pressed and whether or not it makes sound. But this is just the switch. The electrical part. The part that our fingers touch is called the keycap. And this keycap just sits on top of each individual switch. The sort of switch you use define which keycap you can use, although it seems most settled for the convex plus-shaped connector to stay compatible.

Now this keycap broke. And I thought: Well, those keycaps are replaceable. There are literally hundreds of shops that sell whole custom keyboard keycaps. In all sorts of materials, colours, etc. So it shouldn't be that hard to get a single keycap for my enter key, right?

Yeah, no. It took me 6 hours spent over 2 days to find a shop that:

  1. Sells either individual keys or small replacement collections
  2. Has the enter keycap in ISO design (2 rows high instead of just 1)
  3. Is located in the EU, preferably Germany (shipping time/cost)

If I had placed my order in one of the many Taiwanese shops I would have to pay US-$ 2,50 for the key, an additional US-$ 30 for shipping and have to wait 3-6 weeks. Too expensive. Too long.

The shop where I bought my Das Keyboard in 2012 still exists: GetDigital.de. And judging from what I see they are still the official vendor in Germany. But replacement parts? Nope. Only whole keyboards. Yes, some fancy keycaps for the escape, control or alt keys. Or replacement keycaps with the Linux or MacOS logo for the Windows key. But no keycap for my return key. Narf!

EDIT: I had sent an email to GetDigital asking for a replacement key, due to a mail migration at the mail-provider I used and a new anti-spam software this ended up in the spam folder. I additonally learned that the spam-folder isn't automatically checked for new mail on my phone and yeah..
TL;DR: GetDigital asked for my address and offered to send a replacement key free of charge. They only said that while the color will be the same, the material will be different as this has changed meanwhile. Which is perfectly fine for me.

Heading over to the r/MechanicalKeyboards/ subreddit I was delighted to find a list of vendors in their subreddit's wiki: https://www.reddit.com/r/MechanicalKeyboards/wiki/keycapsellers

Still nothing with matches my criteria...

Only through sheer luck I found a comment linking to the keyboard vendor list from Alex Otos who seems to specialise in keyboard builds. There I finally found 2 shops from Germany. GeekBoards.de from Berlin and Keygem.com from Aachen. GeekBoards sells at least a 4-keycap collection with the enter keycap in the ISO form I need: https://geekboards.de/shop/c0039-enjoypbt-iso-compatibility-keycap-set-light-grey-370?variant=1115 Yai!

Ok, it is in light grey and not black, but I can live with that.

Finally..  I mean 6€ + 7,90€ for shipping (in Germany, the same country!) is also somewhat pricey, but alas at least I have a replacement key. And to be fair: The whole handling and logistics stuff for single keys is the same as when I bought a whole keyboard.

I later found out that r/MechanicalKeyboards/ has a separate list for Germany and GeekBoard is listed there too.. https://www.reddit.com/r/MechanicalKeyboards/wiki/germany_shopping_guide Ah well.. Hopefully this information helps someone else too. 😅

Comments

Test-NetConnection: A useful PowerShell function for basic network troubleshooting

Photo by Pixabay: https://www.pexels.com/photo/white-switch-hub-turned-on-159304/

In corporate networks you often encounter technologies likes proxies, SSL Man-in-the-middle (MITM) appliances (to scan HTTPS traffic) and NAT constructs. All can make it hard and cumbersome to troubleshoot certain problems. For example the common: "Why can I successfully connect to this server/service, while my colleague can't?"

This question is usually accompanied by a lack of useful troubleshooting tools like telnet, netcat, nmap and tcpdump/Wireshark. As they are deemed dangerous hacker tools. Luckily there is PowerShell and as I just learned the Test-NetConnection function, which allows us to troubleshoot using basic TCP-Connections - with this knowledge we can at least rule out or identify certain issues.

PS C:\Users\user> Test-NetConnection -ComputerName 192.168.0.1 -Port 443

ComputerName     : 192.168.0.1
RemoteAddress    : 192.168.0.1
RemotePort       : 443
InterfaceAlias   : Ethernet
SourceAddress    : 192.168.0.2
TcpTestSucceeded : True

Or if you prefer it a bit shorter, there is the tnc alias and the -ComputerName argument can be omitted too.

PS C:\Users\user> tnc 192.168.0.1 -Port 443

ComputerName     : 192.168.0.1
RemoteAddress    : 192.168.0.1
RemotePort       : 443
InterfaceAlias   : Ethernet
SourceAddress    : 192.168.0.2
TcpTestSucceeded : True

It's a bit annoying that you have to use the -Port argument. The common notations like IP:Port or IP Port don't work as expected. The reason is that there is a switch-statement in the function which sets the port based on four pre-defined keywords. Sadly not even HTTPS or SSH are in there.

PS C:\Users\user> (Get-Command Test-NetConnection).Definition
[...]
                switch ($CommonTCPPort)
                {
                ""      {$Return.RemotePort = $Port}
                "HTTP"  {$Return.RemotePort = 80}
                "RDP"   {$Return.RemotePort = 3389}
                "SMB"   {$Return.RemotePort = 445}
                "WINRM" {$Return.RemotePort = 5985}
                }
[...]

I don't know if a lookup based on the C:\Windows\System32\drivers\etc\services file is feasible due to Windows file rights, security, etc. But that certainly would be an improvement. Or add some logic like "If the second argument is an integer, use that as the port number".

Anyway, I now have an easy and convenient way of checking TCP-Connections and that is all I need.

Comments

Development of a custom Telegram notification mechanism for new Isso blog comments

Photo by Ehtiram Mammadov: https://www.pexels.com/photo/wooden-door-between-drawers-on-walls-23322329/

After integrating Isso into my Bludit blog, I am slowly starting to receive comments from my dear readers. As Bludit and Isso are separate, there is no easily visible notification of new comments that need to be approved.

As this is a fairly low traffic blog and I'm not constantly checking Isso manually, this has resulted in a comment being stuck in the moderation queue for 7 days. Only approved after the person contacted me directly to point this out.

Problem identified and the solution that immediately came to mind was the following:

  1. Write a script that will be executed every n minutes by a Systemd timer
  2. This script retrieves the number of Isso comments, pending approval, from the sqlite3 database file
  3. If the number is not zero, send a message via Telegram

This should be a feasible solution as long as currently I receive a somewhat low-amount of comments.

Database internals

Isso stores the comments in a sqlite3 database so our first task is to identify the structure (tables, columns) which store the data we need. With .table we get the tables and with .schema comments we get the SQL-Statement which was used to create the corresponding table.

However using PRAGMA table_info(comments); we get a cleaner list of all columns and the associated datatype. https://www.sqlite.org/pragma.html#toc lists all Pragmas in SQLite.

root@admin /opt/isso/db # cp comments.db testcomments.db

root@admin /opt/isso/db # sqlite3 testcomments.db
SQLite version 3.34.1 2021-01-20 14:10:07
Enter ".help" for usage hints.

sqlite> .table
comments     preferences  threads

sqlite> .schema comments
CREATE TABLE comments (     tid REFERENCES threads(id), id INTEGER PRIMARY KEY, parent INTEGER,     created FLOAT NOT NULL, modified FLOAT, mode INTEGER, remote_addr VARCHAR,     text VARCHAR, author VARCHAR, email VARCHAR, website VARCHAR,     likes INTEGER DEFAULT 0, dislikes INTEGER DEFAULT 0, voters BLOB NOT NULL,     notification INTEGER DEFAULT 0);
CREATE TRIGGER remove_stale_threads AFTER DELETE ON comments BEGIN     DELETE FROM threads WHERE id NOT IN (SELECT tid FROM comments); END;

sqlite> PRAGMA table_info(comments);
0|tid||0||0
1|id|INTEGER|0||1
2|parent|INTEGER|0||0
3|created|FLOAT|1||0
4|modified|FLOAT|0||0
5|mode|INTEGER|0||0
6|remote_addr|VARCHAR|0||0
7|text|VARCHAR|0||0
8|author|VARCHAR|0||0
9|email|VARCHAR|0||0
10|website|VARCHAR|0||0
11|likes|INTEGER|0|0|0
12|dislikes|INTEGER|0|0|0
13|voters|BLOB|1||0
14|notification|INTEGER|0|0|0

From the first look the column mode looks like what we want. To test this I created a new comment which is pending approvement.

user@host /opt/isso/db # sqlite3 testcomments.db <<< 'select * from comments where mode == 2;'
5|7||1724288099.62894||2|ip.ip.ip.ip|etertert|test||https://admin.brennt.net|0|0||0

And we got confirmation as only the new comment is listed. After approving the comment's mode changes to 1. Therefore we found a way to identify comments pending approval.

The check-isso-comments.sh script

Adding a bit of fail-safe and output we hack together the following script.

If you want to use it you need to fill in the values for TELEGRAM_CHAT_ID & TELEGRAM_BOT_TOKEN. Where TELEGRAM_CHAT_ID is the ID of the person who shall receive the messages and TELEGRAM_BOT_TOKEN takes your Bot's Token for accessing Telegrams HTTP-API.

Please always check https://github.com/ChrLau/scripts/blob/master/check-isso-comments.sh for the current version. I'm not going to update the script in this blogpost anymore.

#!/bin/bash
# vim: set tabstop=2 smarttab shiftwidth=2 softtabstop=2 expandtab foldmethod=syntax :

# Bash strict mode
#  read: http://redsymbol.net/articles/unofficial-bash-strict-mode/
set -euo pipefail
IFS=$'\n\t'

# Generic
VERSION="1.0"
#SOURCE="https://github.com/ChrLau/scripts/blob/master/check-isso-comments.sh"
# Values
TELEGRAM_CHAT_ID=""
TELEGRAM_BOT_TOKEN=""
ISSO_COMMENTS_DB=""
# Needed binaries
SQLITE3="$(command -v sqlite3)"
CURL="$(command -v curl)"
# Colored output
RED="\e[31m"
#GREEN="\e[32m"
ENDCOLOR="\e[0m"

# Check that variables are defined
if [ -z "$TELEGRAM_CHAT_ID" ] || [ -z "$TELEGRAM_BOT_TOKEN" ] || [ -z "$ISSO_COMMENTS_DB" ]; then
  echo "${RED}This script requires the variables TELEGRAM_CHAT_ID, TELEGRAM_BOT_TOKEN and ISSO_COMMENTS_DB to be set. Define them at the top of this script.${ENDCOLOR}"
  exit 1;
fi

# Test if sqlite3 is present and executeable
if [ ! -x "${SQLITE3}" ]; then
  echo "${RED}This script requires sqlite3 to connect to the database. Exiting.${ENDCOLOR}"
  exit 2;
fi

# Test if ssh is present and executeable
if [ ! -x "${CURL}" ]; then
  echo "${RED}This script requires curl to send the message via Telegram API. Exiting.${ENDCOLOR}"
  exit 2;
fi

# Test if the Isso comments DB file is readable
if [ ! -r "${ISSO_COMMENTS_DB}" ]; then
  echo "${RED}The ISSO sqlite3 database ${ISSO_COMMENTS_DB} is not readable. Exiting.${ENDCOLOR}"
  exit 3;
fi

COMMENT_COUNT=$(echo "select count(*) from comments where mode == 2" | sqlite3 "${ISSO_COMMENTS_DB}")

TEMPLATE=$(cat <<TEMPLATE
<strong>ISSO Comment checker</strong>

<pre>${COMMENT_COUNT} comments need approval</pre>
TEMPLATE
)

if [ "${COMMENT_COUNT}" -gt 0 ]; then

  ${CURL} --silent --output /dev/null \
    --data-urlencode "chat_id=${TELEGRAM_CHAT_ID}" \
    --data-urlencode "text=${TEMPLATE}" \
    --data-urlencode "parse_mode=HTML" \
    --data-urlencode "disable_web_page_preview=true" \
    "https://api.telegram.org/bot${TELEGRAM_BOT_TOKEN}/sendMessage"

fi

Executing this script on the command-line will already sent a notification to me via Telegram. However I do want this to be automated hence I make use of a Systemd timer.

Systemd configuration

I use the following timer to get notified between 10 to 22 o'clock as there is no need to spam me with message when I can't do anything. I create the files as /etc/systemd/system/isso-comments.timer and /etc/systemd/system/isso-comments.service.

user@host ~ # systemctl cat isso-comments.timer
# /etc/systemd/system/isso-comments.timer
[Unit]
Description=Checks for new, unapproved Isso comments

[Timer]
# Documentation: https://www.freedesktop.org/software/systemd/man/latest/systemd.time.html#Calendar%20Events
OnCalendar=*-*-* 10..22:00:00
Unit=isso-comments.service

[Install]
WantedBy=default.target

The actual script is started by the following service unit file.

user@host ~ # systemctl cat isso-comments.service
# /etc/systemd/system/isso-comments.service
[Unit]
Description=Check for new unapproved Isso comments
After=network-online.target
Wants=network-online.target

[Service]
# Allows the execution of multiple ExecStart parameters in sequential order
Type=oneshot
# Show status "dead" after commands are executed (this is just commands being run)
RemainAfterExit=no
ExecStart=/usr/local/bin/check-isso-comments.sh

[Install]
WantedBy=default.target

After that it's the usual way of activating & starting a new Systemd unit and timer:

user@host ~ # systemctl daemon-reload

user@host ~ # systemctl enable isso-comments.service
Created symlink /etc/systemd/system/default.target.wants/isso-comments.service → /etc/systemd/system/isso-comments.service.
user@host ~ # systemctl enable isso-comments.timer
Created symlink /etc/systemd/system/default.target.wants/isso-comments.timer → /etc/systemd/system/isso-comments.timer.

user@host ~ # systemctl start isso-comments.timer
user@host ~ # systemctl status isso-comments.timer
● isso-comments.timer - Checks for new, unapproved Isso comments
     Loaded: loaded (/etc/systemd/system/isso-comments.timer; enabled; vendor preset: enabled)
     Active: active (waiting) since Mon 2024-09-09 19:33:45 CEST; 2s ago
    Trigger: Mon 2024-09-09 20:00:00 CEST; 26min left
   Triggers: ● isso-comments.service

Sep 09 19:33:45 admin systemd[1]: Started Checks for new, unapproved Isso comments.
user@host ~ # systemctl start isso-comments.service
user@host ~ # systemctl status isso-comments.service
● isso-comments.service - Check for new unapproved Isso comments
     Loaded: loaded (/etc/systemd/system/isso-comments.service; enabled; vendor preset: enabled)
     Active: inactive (dead) since Mon 2024-09-09 19:33:58 CEST; 14s ago
TriggeredBy: ● isso-comments.timer
    Process: 421812 ExecStart=/usr/local/bin/check-isso-comments.sh (code=exited, status=0/SUCCESS)
   Main PID: 421812 (code=exited, status=0/SUCCESS)
        CPU: 23ms

Sep 09 19:33:58 admin systemd[1]: Starting Check for new unapproved Isso comments...
Sep 09 19:33:58 admin systemd[1]: isso-comments.service: Succeeded.
Sep 09 19:33:58 admin systemd[1]: Finished Check for new unapproved Isso comments.

user@host ~ # systemctl list-timers
NEXT                         LEFT          LAST                         PASSED        UNIT                         ACTIVATES
Mon 2024-09-09 20:00:00 CEST 22min left    n/a                          n/a           isso-comments.timer          isso-comments.service
Tue 2024-09-10 00:00:00 CEST 4h 22min left Mon 2024-09-09 00:00:00 CEST 19h ago       logrotate.timer              logrotate.service
Tue 2024-09-10 00:00:00 CEST 4h 22min left Mon 2024-09-09 00:00:00 CEST 19h ago       man-db.timer                 man-db.service
Tue 2024-09-10 06:10:34 CEST 10h left      Mon 2024-09-09 06:06:10 CEST 13h ago       apt-daily-upgrade.timer      apt-daily-upgrade.service
Tue 2024-09-10 11:42:59 CEST 16h left      Mon 2024-09-09 19:33:17 CEST 4min 28s ago  apt-daily.timer              apt-daily.service
Tue 2024-09-10 14:22:35 CEST 18h left      Mon 2024-09-09 14:22:35 CEST 5h 15min ago  systemd-tmpfiles-clean.timer systemd-tmpfiles-clean.service
Sun 2024-09-15 03:10:04 CEST 5 days left   Sun 2024-09-08 03:10:27 CEST 1 day 16h ago e2scrub_all.timer            e2scrub_all.service
Mon 2024-09-16 01:21:39 CEST 6 days left   Mon 2024-09-09 00:45:54 CEST 18h ago       fstrim.timer                 fstrim.service

9 timers listed.
Pass --all to see loaded but inactive timers, too.

And now I'm getting informed in time of new comments. Yai!

Comments