A small pre-preface for users who followed the "Ultimate Pi-hole Setup" tutorial from the YouTuber WunderTech
If you used the configuration files he provided on his homepage: https://www.wundertech.net/ultimate-pi-hole-setup/ you will experience the exact same problems sooner or later.
The reason is that the VIPs from keepalived are not bound on a separate dummy interface and hence the pihole-FTL process will take them into account when dynamically building the hostname and choosing the "correct IPs".
You HAVE to at least enable dns.reply.host in the /etc/pihole/pihole.toml to mark the static IP used for the server Pi-hole is running on.
Jump to The solution if you are not interested in the details.
Preface
One of the main reasons why I have my homelab is to hone my skills. And today was a day this happened.
From my one of my LAN hosts I wanted to connect to my Raspberry4 (raspi4.lan, IP: 192.168.178.8) via SSH. This host is configured as the secondary/backup instance in keepalived for the DNS VIP (192.168.178.100).
The reality however was different:
user@lanadmin:~$ ssh raspi4.lan
@@@@@@@@@@@@@@@@@@@@@@@@@@@@@@@@@@@@@@@@@@@@@@@@@@@@@@@@@@@
@    WARNING: REMOTE HOST IDENTIFICATION HAS CHANGED!     @
@@@@@@@@@@@@@@@@@@@@@@@@@@@@@@@@@@@@@@@@@@@@@@@@@@@@@@@@@@@
IT IS POSSIBLE THAT SOMEONE IS DOING SOMETHING NASTY!
Someone could be eavesdropping on you right now (man-in-the-middle attack)!
It is also possible that a host key has just been changed.
The fingerprint for the ED25519 key sent by the remote host is
SHA256:xxxxxxxxxxxxxxxxxxxxxxxxxxxxxxxxxxxxx
Please contact your system administrator.
Add correct host key in /home/user/.ssh/known_hosts to get rid of this message.
Offending ECDSA key in /home/user/.ssh/known_hosts:10
  remove with:
  ssh-keygen -f '/home/user/.ssh/known_hosts' -R 'raspi4.lan'
Host key for raspi4.lan has changed and you have requested strict checking.
Host key verification failed.
user@lanadmin:~$  ssh-keygen -f '/home/user/.ssh/known_hosts' -R 'raspi4.lan'
# Host raspi4.lan found: line 8
# Host raspi4.lan found: line 9
# Host raspi4.lan found: line 10
/home/user/.ssh/known_hosts updated.
Original contents retained as /home/user/.ssh/known_hosts.old
Granted I don't log on often onto raspi4.lan as everything is automated and monitored and the Pi-hole config is synced via Nebula-Sync from raspi3.lan. So I suspected I didn't purge the entries related to raspi4.lan from my ~/.ssh/known_hosts file after I re-installed that system a while ago.
user@lanadmin:~$ ssh raspi4.lan
The authenticity of host 'raspi4.lan (ULA:ffff)' can't be established.
ED25519 key fingerprint is SHA256:xxxxxxxxxxxxxxxxxxxxxxxxxxxxxxxxxxxxxxxxxx
This host key is known by the following other names/addresses:
    ~/.ssh/known_hosts:5: raspi3.lan
    ~/.ssh/known_hosts:12: 192.168.178.9
Are you sure you want to continue connecting (yes/no/[fingerprint])? yes
Warning: Permanently added 'raspi4.lan' (ED25519) to the list of known hosts.
Linux raspi3 6.1.21-v8+ #1642 SMP PREEMPT Mon Apr  3 17:24:16 BST 2023 aarch64
###############################
## Primary Pi-hole instance! ##
###############################
Last login: Fri Jul 24 21:46:36 2026 from w.x.y.z

user@raspi3:~$
Huh? How did I end up on raspi3.lan, when I clearly entered raspi4.lan as the host to connect to? Something is very wrong.
Sadly I overlooked that the IP SSH provided did list the IPv6 VIP (ending in :ffff) which is plain wrong, but it shouldn't take long for me to discover that..
Overview over the current setup
We have two Raspberry Pi's in this setup.
Host A: Raspberry 3
IPv4: 192.168.178.9/24
IPv6: ULA:9/64
Hostname: raspi3.lan
Keepalived: Primary
Host B: Raspberry 4
IPv4: 192.168.178.8/24
IPv6: ULA:8/64
Hostname: raspi4.lan
Keepalived: Secondary
The three used VIPs are:
VIPv4: 192.168.178.100/32 (DNS: pihole.lan) and 192.168.178.101/32 unused, just for testing
VIPv6: ULA:ffff/128 (DNS: pihole.lan)
Both Raspberries run a Pi-hole instance with unbound and keepalived. The VIPs are automatically configured on eth0 on the primary instance. raspi3.lan has the primary keepalived role.
It's always DNS™
At first I suspected that I screwed up when I created my local DNS entries, but no the Local DNS records in my Pi-Hole setup are fine. The IPs for the hosts and vip match. The config is synced with nebula-sync from raspi3.lan to raspi4.lan, so no room for typos there. Nevertheless I accessed both WebUIs and checked independently, wouldn't be the first time a sync-mechanism failed. However, everything was in order.
A dig however showed the problem clearly:
root@lanadmin:~# dig -t a raspi3.lan +noall +answer
raspi3.lan.             0       IN      A       192.168.178.9
root@lanadmin:~# dig -t a raspi4.lan +noall +answer
raspi4.lan.             0       IN      A       192.168.178.100
The /etc/resolv.conf of that system is:
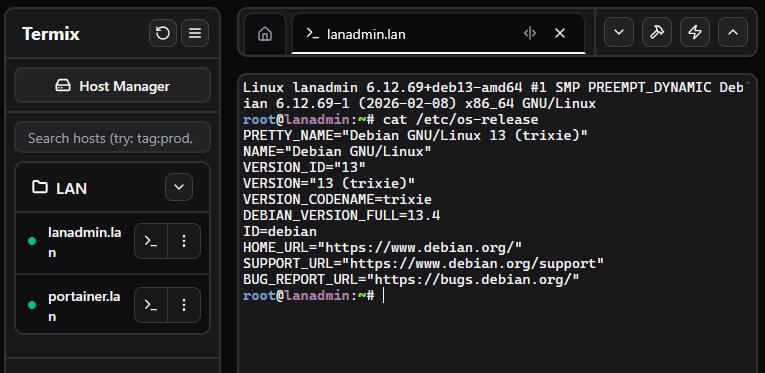
root@lanadmin:~# cat /etc/resolv.conf
domain lan
search lan
nameserver 192.168.178.8
nameserver 192.168.178.9
So raspi4.lan is queried first, than raspi3.lan. And I forgot to change the nameserver to the VIP...
/etc/hosts was also fine. Only standard entries for the .8 on raspi4.lan and .9 on raspi3.lan. In short: the local eth0 system IPs with the corresponding FQDN and hostname.
getent hosts however was a bit strange too. It returned the loopback address when each host asked for it's own name:
root@raspi3:~# getent hosts raspi3.lan
::1             raspi3.lan
root@raspi3:~# getent hosts raspi4.lan
192.168.178.8   raspi4.lan

root@raspi4:~# getent hosts raspi4.lan
::1             raspi4.lan
root@raspi4:~# getent hosts raspi3.lan
192.168.178.9   raspi3.lan
Hence I suspected Avahi (mDNS) as it's installed and listed before the dns resolution in /etc/nsswitch.conf:
root@raspi4:~# grep hosts /etc/nsswitch.conf
hosts:          files mdns4_minimal [NOTFOUND=return] dns
But several hard facts speak against this.
- Avahi only works for entries ending in
.local
dig doesn't use libnss and therefore doesn't honor mDNS/Avahi at all, but it still showed the wrong IPs
These two facts effectively eliminated Avahi/mDNS as the source of the problem. Avahi was however responsible for returning the loopback address when the host queried for it's own IP. After all mdns4_minimal was listed before dns in /etc/nsswitch.conf. So that works as designed, but doesn't help at all during troubleshooting as it just adds to the confusion..
The hosts don't know themselves...
At my wits end I took a step back and decided to check DNS from a third host against both raspi3.lan (192.168.178.9) and raspi4.lan (192.168.178.8) how both resolve the DNS A-Records of each other.
# Querying for the IPv4 of raspi3.lan
# Against raspi3.lan
root@lanadmin:~# dig @192.168.178.9 raspi3.lan +noall +answer
raspi3.lan.             0       IN      A       192.168.178.101
# Against raspi4.lan
root@lanadmin:~# dig @192.168.178.8 raspi3.lan +noall +answer
raspi3.lan.             0       IN      A       192.168.178.9

# Querying for the IPv4 of raspi4.lan
# Against raspi4.lan
root@lanadmin:~# dig @192.168.178.8 raspi4.lan +noall +answer
raspi4.lan.             0       IN      A       192.168.178.100
# Against raspi3.lan
root@lanadmin:~# dig @192.168.178.9 raspi4.lan +noall +answer
raspi4.lan.             0       IN      A       192.168.178.8
This is looks strange.
Whenever we ask a Raspberry itself for it's own IP we get a wrong result.
Querying 192.168.178.9 (raspi3.lan) to resolve raspi3.lan returns 192.168.178.101.
Querying 192.168.178.8 (raspi4.lan) to resolve raspi4.lan returns 192.168.178.100.
How? Avahi was ruled out. There was no DHCP at play and the static DNS entries are correct.
Something was messing with my setup.
Is it Pi-hole?
I diff'd the /etc/pihole/pihole.toml suspecting I missed something in that, as I knew that the pihole.toml isn't sync by nebula-sync, but there was nothing.
user@lanadmin:~$ diff -u <(ssh 192.168.178.8 sudo cat /etc/pihole/pihole.toml) <(ssh 192.168.178.9 sudo cat /etc/pihole/pihole.toml)
--- /dev/fd/63  2026-07-25 03:44:15.628030101 +0200
+++ /dev/fd/62  2026-07-25 03:44:15.628030101 +0200
@@ -1,7 +1,7 @@
 # Pi-hole configuration file (v6.7)
 # Encoding: UTF-8
 # This file is managed by pihole-FTL
-# Last updated on 2026-07-14 10:31:50 CEST
+# Last updated on 2026-07-24 23:26:54 CEST

 [dns]
   # Upstream DNS Servers to be used by Pi-hole. If this is not set, Pi-hole will not
I searched a bit and stumbled upon a setting regarding FTL: dns.domain and dns.expandHosts.
  [dns.domain]
    # The DNS domain used by your Pi-hole.
    #
    # This DNS domain is purely local. FTL may answer queries from its local cache and
    # configuration but *never* forwards any requests upstream *unless* you have
    # configured a dns.revServer exactly for this domain. In the latter case, all queries
    # for this domain are sent exclusively to this server (including reverse lookups).
    #
    # For DHCP, this has two effects; firstly it causes the DHCP server to return the
[... removed as DHCP is not relevant in this case ...]
    #
    # You can disable setting a domain by setting this option to an empty string.
    #
    # Allowed values are:
    #     Any valid domain
    name = "lan"
So the FTL-Cache will be queried for records ending in .lan, which is fine as it's my local domain and requests for .lan shouldn't leave my home network. Additionally I understood the sentence "but never forwards any requests upstream" as: These requests don't even hit Unbound or dnsmasq.
expandHosts makes sure the FQDN is added to /etc/hosts. Something I already did manually (or the Debian installer).
  # If set, the domain is added to simple names (without a period) in /etc/hosts in the
  # same way as for DHCP-derived names
  #
  # Allowed values are:
  #     true or false
  expandHosts = true ### CHANGED, default = false
From what I read online pihole-FTL builds the FQDN of the local system itself completely independent from settings in /etc/hosts + dns.domain. Could this be a lead?
How do we verify the entry is actually in the cache and contains the wrong IP? Glad I asked myself! The command killall -USR1 pihole-FTL
dumps the cache entries from dnsmasq into /var/log/pihole/pihole.log.
root@raspi4:~# killall -USR1 pihole-FTL
root@raspi4:~# vi /var/log/pihole/pihole.log
Jul 25 02:49:12 dnsmasq[1147]: time 1784940552
Jul 25 02:49:12 dnsmasq[1147]: cache size 10000, 0/141 cache insertions re-used unexpired cache entries.
[...]
Jul 25 02:49:12 dnsmasq[1147]: Host        Address            Flags      Expires      Source
Jul 25 02:49:12 dnsmasq[1147]: ----------- ------------------ ---------- ------------ ------------
Jul 25 02:49:12 dnsmasq[1147]: pihole.lan  192.168.178.100    4FRI   H                /etc/pihole/hosts/custom.list
Jul 25 02:49:12 dnsmasq[1125]: raspi4.lan  192.168.178.8      4FRI   H                /etc/hosts
Jul 25 02:49:12 dnsmasq[1125]: raspi3.lan  192.168.178.9      4FRI   H                /etc/pihole/hosts/custom.list
Well, that only proves my assumption that local static DNS records are NOT honored, if the hostname matches the host on which Pi-hole is running. We can clearly see that the entry for raspi4.lan has a source of /etc/hosts and not /etc/pihole/hosts/custom.list, while the record for raspi3.lan is taken from /etc/pihole/hosts/custom.list.
This proves that some, currently unknown, automatism is at work and goes horribly wrong.
If nothing helps, try rebooting
As I had no real trace of where to look next, I now focused on trying to re-produce the issue. After all, if it was just some quirk of a non-restarted service utilizing some old file - only present in the cache of it's processes file handles.. As raspi4.lan currently was the secondary node for keepalived, it didn't own the VIPs. Hence I stopped the keepalived process on raspi3.lan, forcing a failover to raspi4.lan. After making sure raspi4.lan had the VIPs I rebooted the system.
It gets stranger...
After the reboot, in order to get a bit more insight, I executed several dig queries and watched the log simultaneously. All @ip's are IPs which are currently present on the eth0 interface of the raspi4.lan host.
Those were the commands:
root@lanadmin:~# dig @192.168.178.8 raspi4.lan +noall +answer
raspi4.lan.             0       IN      A       192.168.178.100
root@lanadmin:~# dig @192.168.178.100 raspi4.lan +noall +answer
raspi4.lan.             0       IN      A       192.168.178.100
root@lanadmin:~# dig @192.168.178.101 raspi4.lan +noall +answer
raspi4.lan.             0       IN      A       192.168.178.100

# On raspi4.lan, just to have everything neatly together:
root@raspi4:~# killall -USR1 pihole-FTL
And this showed up in the logfile:
root@raspi4:~# tail -f /var/log/pihole/pihole.log |grep "raspi4.lan"
Jul 25 02:58:17 dnsmasq[1125]: query[A] raspi4.lan from 192.168.178.7
Jul 25 02:58:17 dnsmasq[1125]: Pi-hole hostname raspi4.lan is 192.168.178.100
Jul 25 02:58:17 dnsmasq[1125]: query[A] raspi4.lan from 192.168.178.7
Jul 25 02:58:17 dnsmasq[1125]: Pi-hole hostname raspi4.lan is 192.168.178.100
Jul 25 02:58:17 dnsmasq[1125]: query[A] raspi4.lan from 192.168.178.7
Jul 25 02:58:17 dnsmasq[1125]: Pi-hole hostname raspi4.lan is 192.168.178.100
Jul 25 02:58:36 dnsmasq[1125]: raspi4.lan   192.168.178.8     4FRI   H     /etc/hosts
And here I tilted a bit. Why does the log state "Pi-hole hostname raspi4.lan is 192.168.178.100" but then, just seconds later state that the IP retrieved from /etc/hosts is 192.168.178.8? At least the IP 192.168.178.100 was reliably returned for all queries towards IPs on the eth0 interface of raspi4.lan with the goal to resolve the name raspi4.lan. It wasn't some kind of race-condition nor did it feel like a bug.
And just to be sure, I tried logging into raspi4.lan from lanadmin.lan:
user@lanadmin:~$ ssh raspi4.lan
@@@@@@@@@@@@@@@@@@@@@@@@@@@@@@@@@@@@@@@@@@@@@@@@@@@@@@@@@@@
@    WARNING: REMOTE HOST IDENTIFICATION HAS CHANGED!     @
@@@@@@@@@@@@@@@@@@@@@@@@@@@@@@@@@@@@@@@@@@@@@@@@@@@@@@@@@@@
IT IS POSSIBLE THAT SOMEONE IS DOING SOMETHING NASTY!
Someone could be eavesdropping on you right now (man-in-the-middle attack)!
It is also possible that a host key has just been changed.
The fingerprint for the ED25519 key sent by the remote host is
SHA256:xxxxxxxxxxxxxxxxxxxxxxxxxxxxxxxxxxxxxxxxxxxxxxxxxxxxx.
Please contact your system administrator.
Add correct host key in /home/user/.ssh/known_hosts to get rid of this message.
Offending ED25519 key in /home/user/.ssh/known_hosts:16
  remove with:
  ssh-keygen -f '/home/user/.ssh/known_hosts' -R 'raspi4.lan'
Host key for raspi4.lan has changed and you have requested strict checking.
Host key verification failed.
user@lanadmin:~$ host raspi4.lan
raspi4.lan has address 192.168.178.100
raspi4.lan has IPv6 address fd6d:f92:17e4:0:464e:6dff:feb5:ffff
Nope, still the same problem. Only that this time I would have actually logged on to the right host, as the IP was currently owned by raspi4.lan. Nonetheless did the hostname still resolve to the wrong IP.
I had no idea why the IP kept changing. Yes, I had provided no specific IP for pihole-FTL to listen on, but this should never lead to such an behaviour. I decided to read through /etc/pihole/pihole.toml, if only to set a specific listener address and do a bit more troubleshooting.
Finally: Enlightenment
Revelation hit me, when I read the [dns.reply.host] block. The describe behaviour matched the observed one perfectly!
    [dns.reply.host]
      # Use a specific IPv4 address for the Pi-hole host? By default, FTL determines the
      # address of the interface a query arrived on and uses this address for replying to A
      # queries with the most suitable address for the requesting client.
      #
      # This setting can be used to use a fixed, rather than the dynamically obtained,
      # address when Pi-hole responds to the following names:
      # - "pi.hole"
      # - "<the device's hostname>"
      # - "pi.hole.<local domain>"
      # - "<the device's hostname>.<local domain>"
      #
      # Allowed values are:
      #     true or false
      force4 = false

      # Custom IPv4 address for the Pi-hole host
      #
      # Allowed values are:
      #     A valid IPv4 address or empty string ("")
      IPv4 = ""

      # Use a specific IPv6 address for the Pi-hole host? See description for the IPv4
      # variant above for further details.
      #
      # Allowed values are:
      #     true or false
      force6 = false

      # Custom IPv6 address for the Pi-hole host
      #
      # Allowed values are:
      #     A valid IPv6 address or empty string ("")
      IPv6 = ""
As it can be clearly seen, static IPs for the local hostname were disabled. This made FTL choose a new "best matching" IP for each received query. Which is such a strange mechanism to implement! Why obscure such things!?
Why design such a ... mechanism?
And then it hit me.. Novice and inexperienced users. Pi-hole is a DNS and Ad-Blocker. Primarily aimed at home users. And those lack knowledge and experience. I'm a frequent reader of subreddits like r/selfhosted or r/HomeServer so I know full well how many users struggle with IPs, interface bindings, file rights, etc. All the basic stuff one learns over time but can be pretty hard for people new to Linux.
I suspect this mechanism was developed to ease the usage of Pi-hole, to just "make it work" no matter what. Alas.. This caused way more trouble for an experienced user this way. And this is why I don't really like that they implemented this mechanism. It's just one of these automatisms which ignore standards and work without following an established process. Effectively hindering novice users to learn "How it is normally done"?
The solution
The fix was rather easy. Just enable dns.reply.host for IPv4 and IPv6 and set the corresponding IPs. Then restart the service. Done. Below is the config for raspi4.lan.
    [dns.reply.host]
      # Use a specific IPv4 address for the Pi-hole host? By default, FTL determines the
      # address of the interface a query arrived on and uses this address for replying to A
      # queries with the most suitable address for the requesting client.
      #
      # This setting can be used to use a fixed, rather than the dynamically obtained,
      # address when Pi-hole responds to the following names:
      # - "pi.hole"
      # - "<the device's hostname>"
      # - "pi.hole.<local domain>"
      # - "<the device's hostname>.<local domain>"
      #
      # Allowed values are:
      #     true or false
      force4 = true ### CHANGED, default = false

      # Custom IPv4 address for the Pi-hole host
      #
      # Allowed values are:
      #     A valid IPv4 address or empty string ("")
      IPv4 = "192.168.178.8" ### CHANGED, default = ""

      # Use a specific IPv6 address for the Pi-hole host? See description for the IPv4
      # variant above for further details.
      #
      # Allowed values are:
      #     true or false
      force6 = true ### CHANGED, default = false

      # Custom IPv6 address for the Pi-hole host
      #
      # Allowed values are:
      #     A valid IPv6 address or empty string ("")
      IPv6 = "fd6d:ULA:8" ### CHANGED, default = ""
Please note that I obscured parts of my ULA IPv6 address.
Why didn't I notice sooner?
Then there is always this question which creeps into ones mind: Why didn't I notice it sooner? Why did it work for so long?
At least in this case the answer is simple: I rarely need to login into these systems.
Other improvements
Dummy network interface for VIPs
Apparently it is also better to create a dummy network device and let keepalived bind the VIPs to that interface. One big advantage is that dummy interfaces don't reply to ARP-Requests at all. Which is a crucial problem in HA setup. And also one point WunderTech didn't mention with one word in his tutorial..
VRRP-Scripts to check DNS service availbility/healthiness
In the current setup keepalived will only switch to another machine if it stops sending out VRRP-Announcements, which usually only happens when a machine fails completely (power cut or really catastrophic failures). If just the pihole-FTL service, Unbound or any other piece of software - apart from keepalived - fails nothing will happen.
For this, keepalived supports the execution of VRRP-scripts. These will be executed every few seconds and are there to check service availbility/healthiness and trigger a failover if the script execution fails or doesn't exit successfully.
I plan to write a blog post about that too. When it is ready, I will link it here.


 (Click to enlarge)